死信队列介绍
Dead Letter Exchange 死信交换机(RabbitMQ叫死信队列)
死信队列:没有被及时消费的消息存放的队列
面试:消息变成死信的原因:
- 消息被拒绝(basic.reject/ basic.nack)并且不再重新投递 requeue=false
- TTL(time-to-live) 消息超时未消费
- 达到最大队列长度
实现RabbitMQ死信队列图解

目标队列如何绑定死信交换机
给队列添加参数x-dead-letter-exchange与x-dead-letter-routing-key
import org.springframework.amqp.core.*;
import org.springframework.beans.factory.annotation.Qualifier;
import org.springframework.context.annotation.Bean;
import org.springframework.context.annotation.Configuration;
import java.util.HashMap;
import java.util.Map;


@Configuration // 声明为 配置类
public class RabbitMQConfig {

    public static final String NORMAL_EXCHANGE_NAME = "nomal_topic_exchange";
    public static final String NORMAL_QUEUE_NAME = "nomal_queue";

    public static final String DEAD_EXCHANGE_NAME = "nomal_topic_exchange_dlx";
    public static final String DEAD_QUEUE_NAME = "nomal_queue_dlx";

    // 1 配置正常业务交换机
    @Bean("nomalExchange") // 设置BeanName 为 nomalExchange
    public Exchange bootExchange() {
        TopicExchange exchange = new TopicExchange(NORMAL_EXCHANGE_NAME, true, false);
        return exchange;
    }

    // 2 配置正常的队列,同时绑定死信队列
    @Bean("nomalQueue") // 设置BeanName 为 bootQueue
    public Queue bootQueue() {
        Map<String, Object> props = new HashMap<>();
        props.put("x-message-ttl", 60000);
        props.put("x-max-length", 5);
        props.put("x-dead-letter-exchange", DEAD_EXCHANGE_NAME);
        props.put("x-dead-letter-routing-key", "#"); // TTL过期后,就会发往监听死信交换机路由的队列中
        return new Queue(NORMAL_QUEUE_NAME, true, false, false, props);
    }

    // 3 配置正常的 队列与交换机的绑定
    @Bean("nomalBind") //设置BeanName 为 bootBind
    public Binding bootBindQueueExchange(@Qualifier("nomalQueue") Queue queue, @Qualifier("nomalExchange") Exchange exchange) {
        return BindingBuilder
                .bind(queue)
                .to(exchange)
                .with("boot.#")
                .noargs();
    }

    // 4 配置死信交换机
    @Bean("deadExchange") // 设置BeanName 为 bootExchanghe
    public Exchange bootExchangeDLX() {
        TopicExchange exchange = new TopicExchange(DEAD_EXCHANGE_NAME, true, false);
        return exchange;
    }

    // 5 配置死信队列
    @Bean("deadQueue") // 设置BeanName 为 bootQueue
    public Queue bootQueueDLX() {
        Map<String, Object> props = new HashMap<>();
        return new Queue(DEAD_QUEUE_NAME, true, false, false, props);
    }

    // 6 配置死信队列与交换机的绑定
    @Bean("deadBind") //设置BeanName 为 bootBind
    public Binding bootBindQueueExchangeDLX(@Qualifier("deadQueue") Queue queue, @Qualifier("deadExchange") Exchange exchange) {
        return BindingBuilder
                .bind(queue)
                .to(exchange)
                .with("#")
                .noargs();
    }
}
模拟发送消息
    @Autowired
    private RabbitTemplate rabbitTemplate;

    @RequestMapping("/testSend")
    public void testSend(){
        // 发送消息
        rabbitTemplate.convertAndSend(RabbitMQConfig.NORMAL_EXCHANGE_NAME,"boot.hello","死信消息测试");
    }
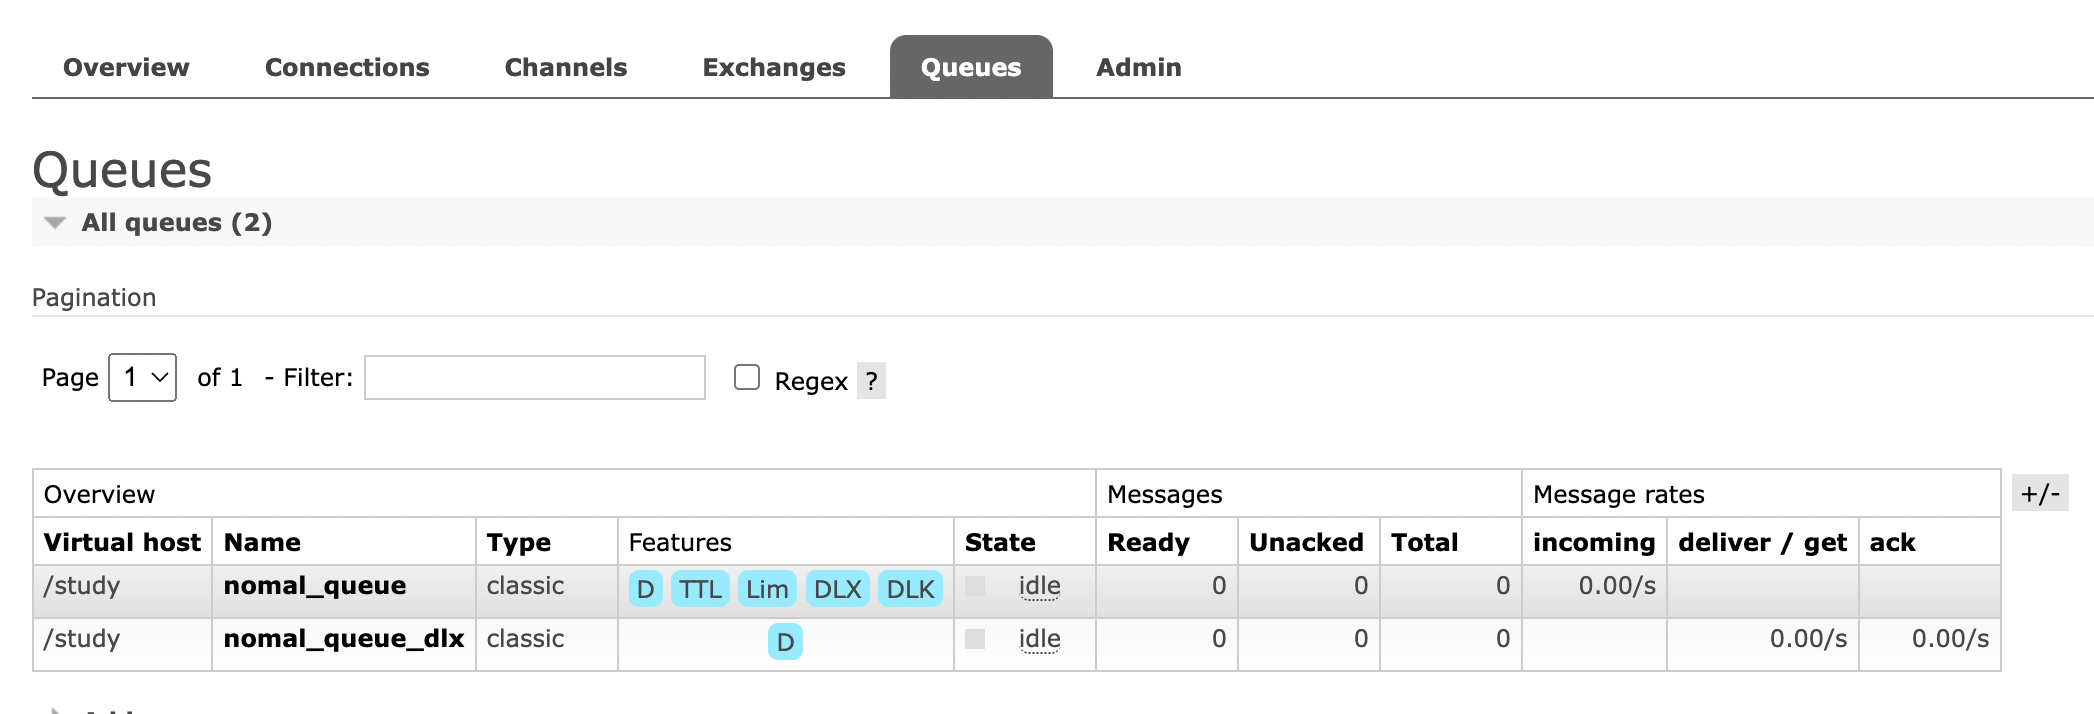
RabbitMQ Dashboard

测试:拒绝消息 消费者监听
import com.rabbitmq.client.Channel;
import lombok.extern.slf4j.Slf4j;
import org.springframework.amqp.core.Message;
import org.springframework.amqp.rabbit.annotation.RabbitListener;
import org.springframework.stereotype.Component;
import java.io.IOException;

@Slf4j
@Component
public class RabbitMQListen01 {

    // 我们需要业务失败才能放入死信交换机,所以我们得监听常规的队列,不能是死信队列
    @RabbitListener(queues = "nomal_queue")
    public void getMessage(Message message, Channel channel) throws IOException {
        try {
            log.info("拿到消息的内容:{}", message); // 这里 不只是输出 单个 发送的信息,而是 全部输出 消息里面的内容数据
            int i = 1/0;
            // 消息处理完成,才能去主动ACK确认
            channel.basicAck(message.getMessageProperties().getDeliveryTag(), true);
        } catch (Exception e) {
            // 如果有异常,主动拒绝此消息,将其放入死信队列 第二个参数True是不放入原有队列了,第三个参数必须为True才行
            channel.basicNack(message.getMessageProperties().getDeliveryTag(), true,false);
            log.error("Error.. Message will put into DLX");
        }
    }
}
TTL + 死信队列 实现延迟队列
思路
- TTL作用是:通过时间过期触发转移消息
- 死信队列作用是:接收转移的消息内容
步骤
- 设置TTL队列与死信队列
- TTL队列中最好不要配置队列的过期时间,也就是最好队列不过期
- 消息过期时间要小于TTL队列的过期时间
- 不要去消费TTL队列的内容,等待消息过期就会自动转移至死信队列
- 我们编写监听死信队列的内容即可
上述有TTL队列死信队列的配置,只需要发消息指定过期时间就行了。我就不上代码了
特殊说明:
上述文章均是作者实际操作后产出。烦请各位,请勿直接盗用!转载记得标注原文链接:www.zanglikun.com
第三方平台不会及时更新本文最新内容。如果发现本文资料不全,可访问本人的Java博客搜索:标题关键字。以获取最新全部资料 ❤
第三方平台不会及时更新本文最新内容。如果发现本文资料不全,可访问本人的Java博客搜索:标题关键字。以获取最新全部资料 ❤
