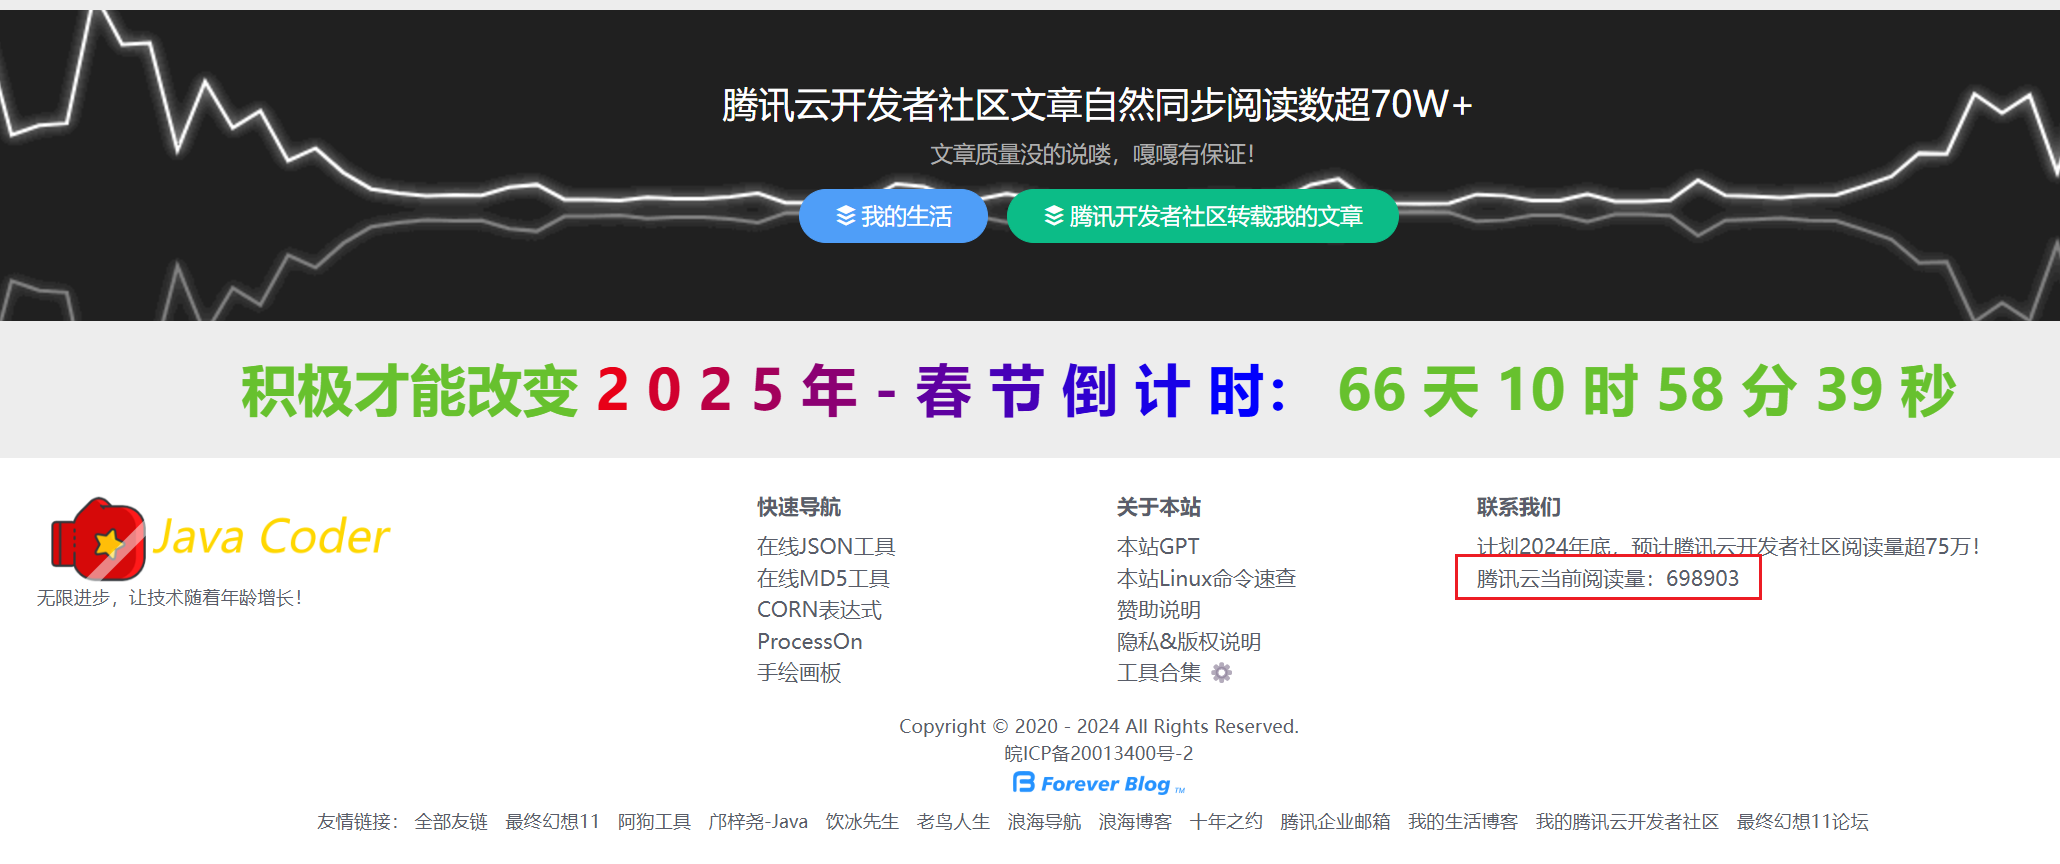
为了实现同步腾讯云博客的阅读量,我就写了这篇文章。

备注:你需要会在服务器搞定时任务。知道cUrl是什么。
免责声明:本博客演示的地址,会随时停止,不得作为你实际生产抓包使用!因恶意爬虫导致的一切责任均有你自己承担!
腾讯云博客原始请求抓包cURL
具体怎么抓包,我就不描述了:找到网页,然后刷新浏览器,看那个接口返回你要的数据了。
我抓包信息如下:
curl 'https://cloud.tencent.com/developer/api/user/rank' \
  -H 'accept: */*' \
  -H 'accept-language: zh-CN,zh;q=0.9' \
  -H 'cache-control: no-cache' \
  -H 'content-type: application/json' \
  -H 'cookie: qcommunity_identify_id=7RwtnPExliPEzqE07eBS7; qcloud_uid=M-BKt29NsS6v; language=zh; qcmainCSRFToken=qpCIFG2Zi2VD; qcloud_visitId=c880bf4e8f77ccbd868c5e1f69f30f35; qcloud_outsite_refer=https://www.zanglikun.com; sajssdk_2015_cross_new_user=1; sensorsdata2015jssdkcross=%7B%22distinct_id%22%3A%221935729864181b-0135ba781948b1-26011851-1638720-19357298642d4c%22%2C%22first_id%22%3A%22%22%2C%22props%22%3A%7B%22%24latest_traffic_source_type%22%3A%22%E5%BC%95%E8%8D%90%E6%B5%81%E9%87%8F%22%7D%2C%22identities%22%3A%22eyIkaWRlbnRpdHlfY29va2llX2lkIjoiMTkzNTcyOTg2NDE4MWItMDEzNWJhNzgxOTQ4YjEtMjYwMTE4NTEtMTYzODcyMC0xOTM1NzI5ODY0MmQ0YyJ9%22%2C%22history_login_id%22%3A%7B%22name%22%3A%22%22%2C%22value%22%3A%22%22%7D%2C%22%24device_id%22%3A%221935729864181b-0135ba781948b1-26011851-1638720-19357298642d4c%22%7D; intl=; _ga=GA1.2.1963929058.1732334160; _gat=1; qcstats_seo_keywords=%E5%93%81%E7%89%8C%E8%AF%8D-%E5%93%81%E7%89%8C%E8%AF%8D-%E8%85%BE%E8%AE%AF%E4%BA%91; _gcl_au=1.1.760994683.1732334160; qcloud_from=qcloud.outside.seo-1732334160061; trafficParams=***%24%3Btimestamp%3D1732334267072%3Bfrom_type%3Dserver%3Btrack%3D225baed5-1c2b-4203-978a-94c1f7b31b5a%3B%24***' \
  -H 'origin: https://cloud.tencent.com' \
  -H 'pragma: no-cache' \
  -H 'priority: u=1, i' \
  -H 'referer: https://cloud.tencent.com/developer/user/6862050' \
  -H 'sec-ch-ua: "Google Chrome";v="131", "Chromium";v="131", "Not_A Brand";v="24"' \
  -H 'sec-ch-ua-mobile: ?0' \
  -H 'sec-ch-ua-platform: "Windows"' \
  -H 'sec-fetch-dest: empty' \
  -H 'sec-fetch-mode: cors' \
  -H 'sec-fetch-site: same-origin' \
  -H 'user-agent: Mozilla/5.0 (Windows NT 10.0; Win64; x64) AppleWebKit/537.36 (KHTML, like Gecko) Chrome/131.0.0.0 Safari/537.36' \
  --data-raw '{"uid":6862050,"year":2024}'
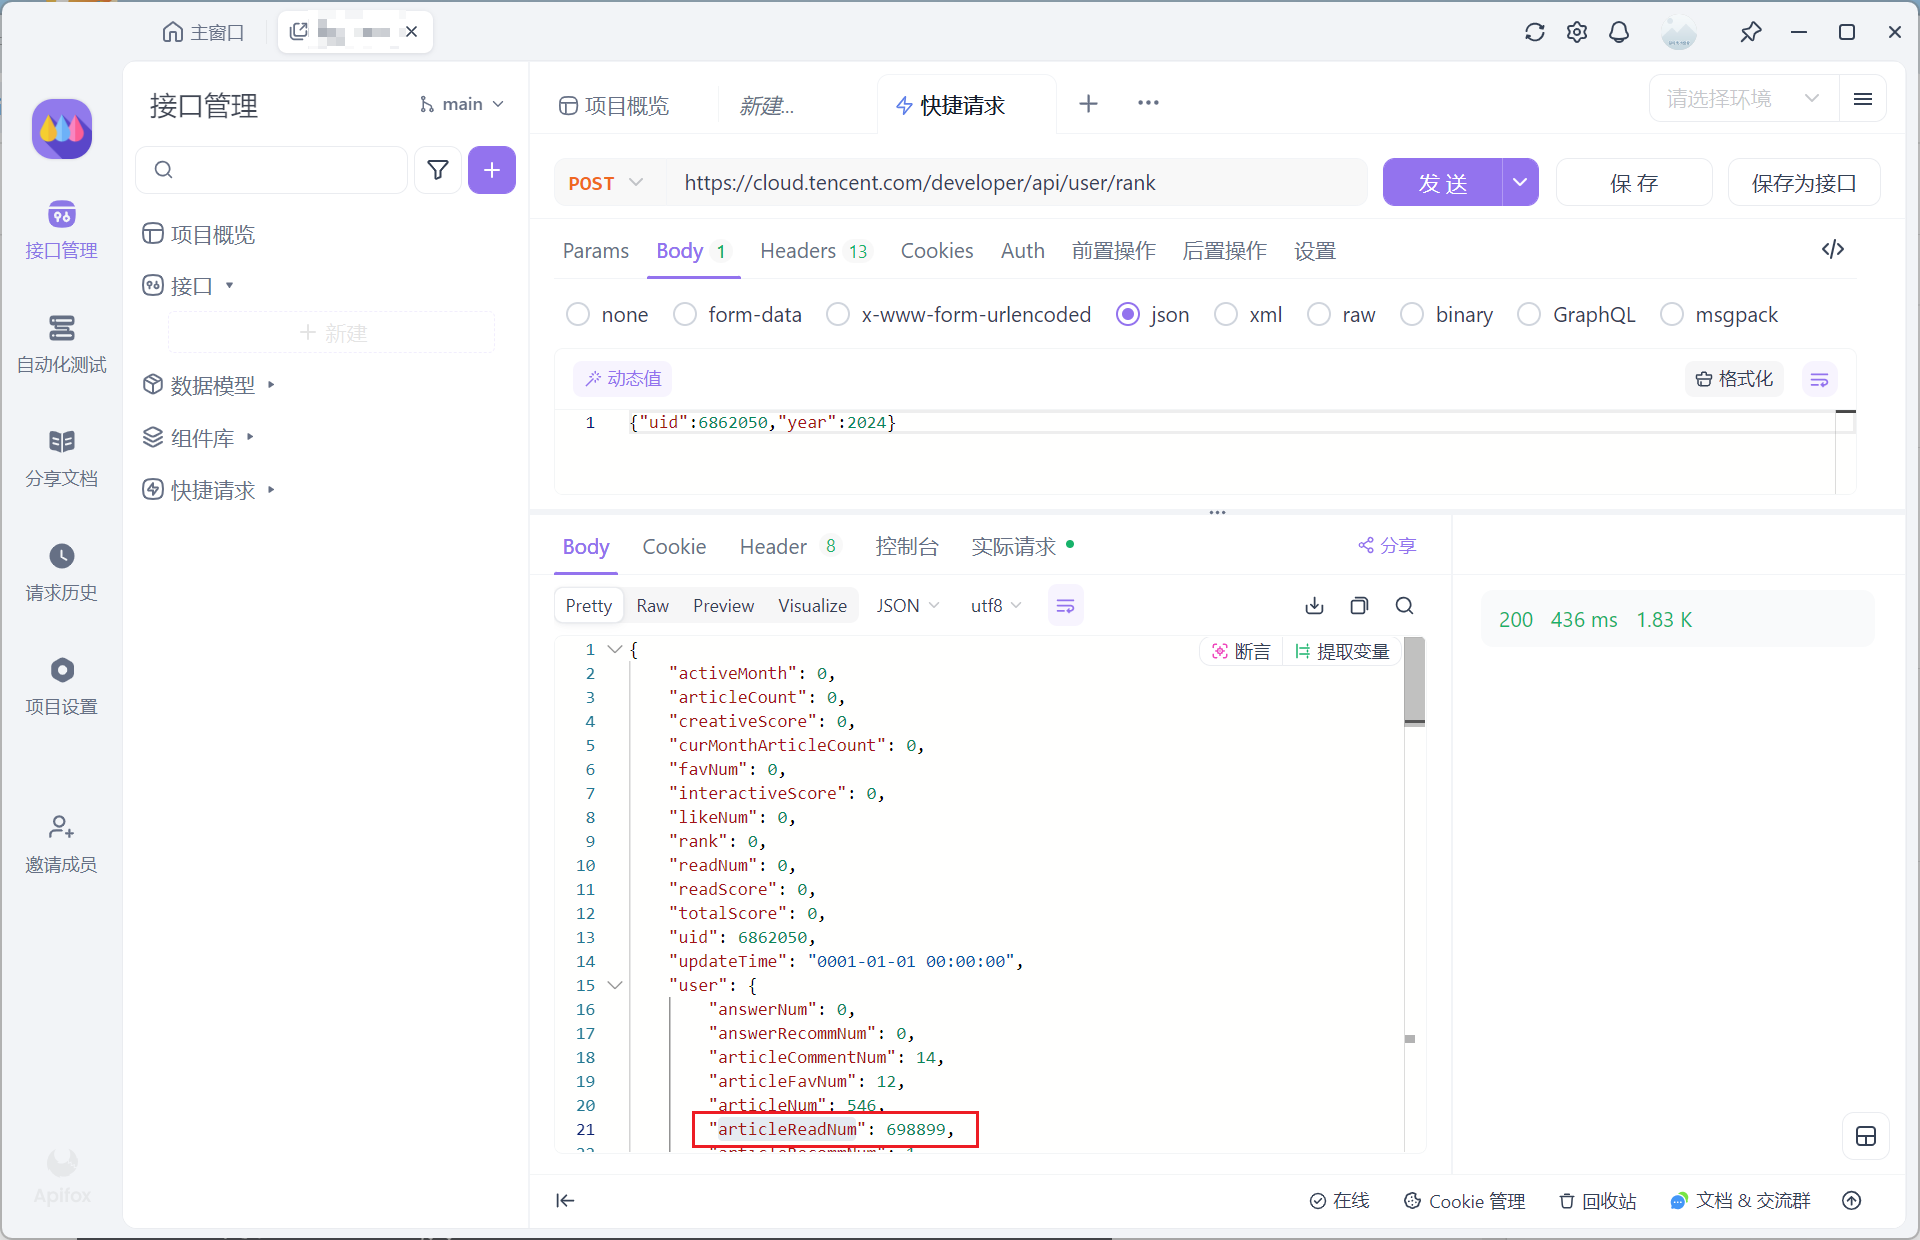
本地调试可行,响应结果是:

NGINX配置 防止前端浏览器跨域
因为前端浏览器发起的请求会有浏览器的同源策略检测,实际发送的请求域名是腾讯云的,我们是本地的url。两者不相同,就会有跨域报错。所以我采用本地Nginx作为解决办法。
    location /txy/rank {
      proxy_pass https://cloud.tencent.com/developer/api/user/rank;

      # 添加 CORS 头
      add_header 'Access-Control-Allow-Origin' '*';
      add_header 'Access-Control-Allow-Methods' 'GET, POST, OPTIONS';
      add_header 'Access-Control-Allow-Headers' 'Content-Type, Authorization';

      # 处理 OPTIONS 请求
      if ($request_method = 'OPTIONS') {
          return 204;
      }
    }
初次尝试HTML代码
下文是GPT帮我写的!因为上文有了NGINX来解决跨域问题。所以我们HTML的域名就是我们Nginx的地址。
<!DOCTYPE html>
      <html lang="en">
      <head>
      <meta charset="UTF-8">
      <meta name="viewport" content="width=device-width, initial-scale=1.0">
      <title>Fetch User Article Read Number 初次尝试</title>
</head>
<body>
<h1>User Article Read Number 初次尝试</h1>
<div id="articleReadNum">Loading...</div>

<script>
  // Function to fetch data from the API
  async function fetchUserData() {
    try {
      const response = await fetch('https://www.你的域名.com/txy/rank', {
        method: 'POST',
        headers: {
          'User-Agent': 'Apifox/1.0.0 (https://apifox.com)',
          'Content-Type': 'application/json'
        },
        body: JSON.stringify({
          uid: 6862050,
          year: 2024
        })
      });

      if (!response.ok) {
        throw new Error('Network response was not ok');
      }

      const data = await response.json();

      // Assuming the structure of your response
      const articleReadNum = data.user.articleReadNum;

      // Display the articleReadNum
      document.getElementById('articleReadNum').innerText = articleReadNum;

    } catch (error) {
      console.error('There was a problem with the fetch operation:', error);
      document.getElementById('articleReadNum').innerText = 'Error fetching data';
    }
  }

  // Call the function to fetch data when the page loads
  fetchUserData();
</script>
</body>
</html>
</title>
</head>
<body>

</body>
</html>
HTML对应的效果展示
User Article Read Number 初次尝试
713989
实际遇到新问题分析
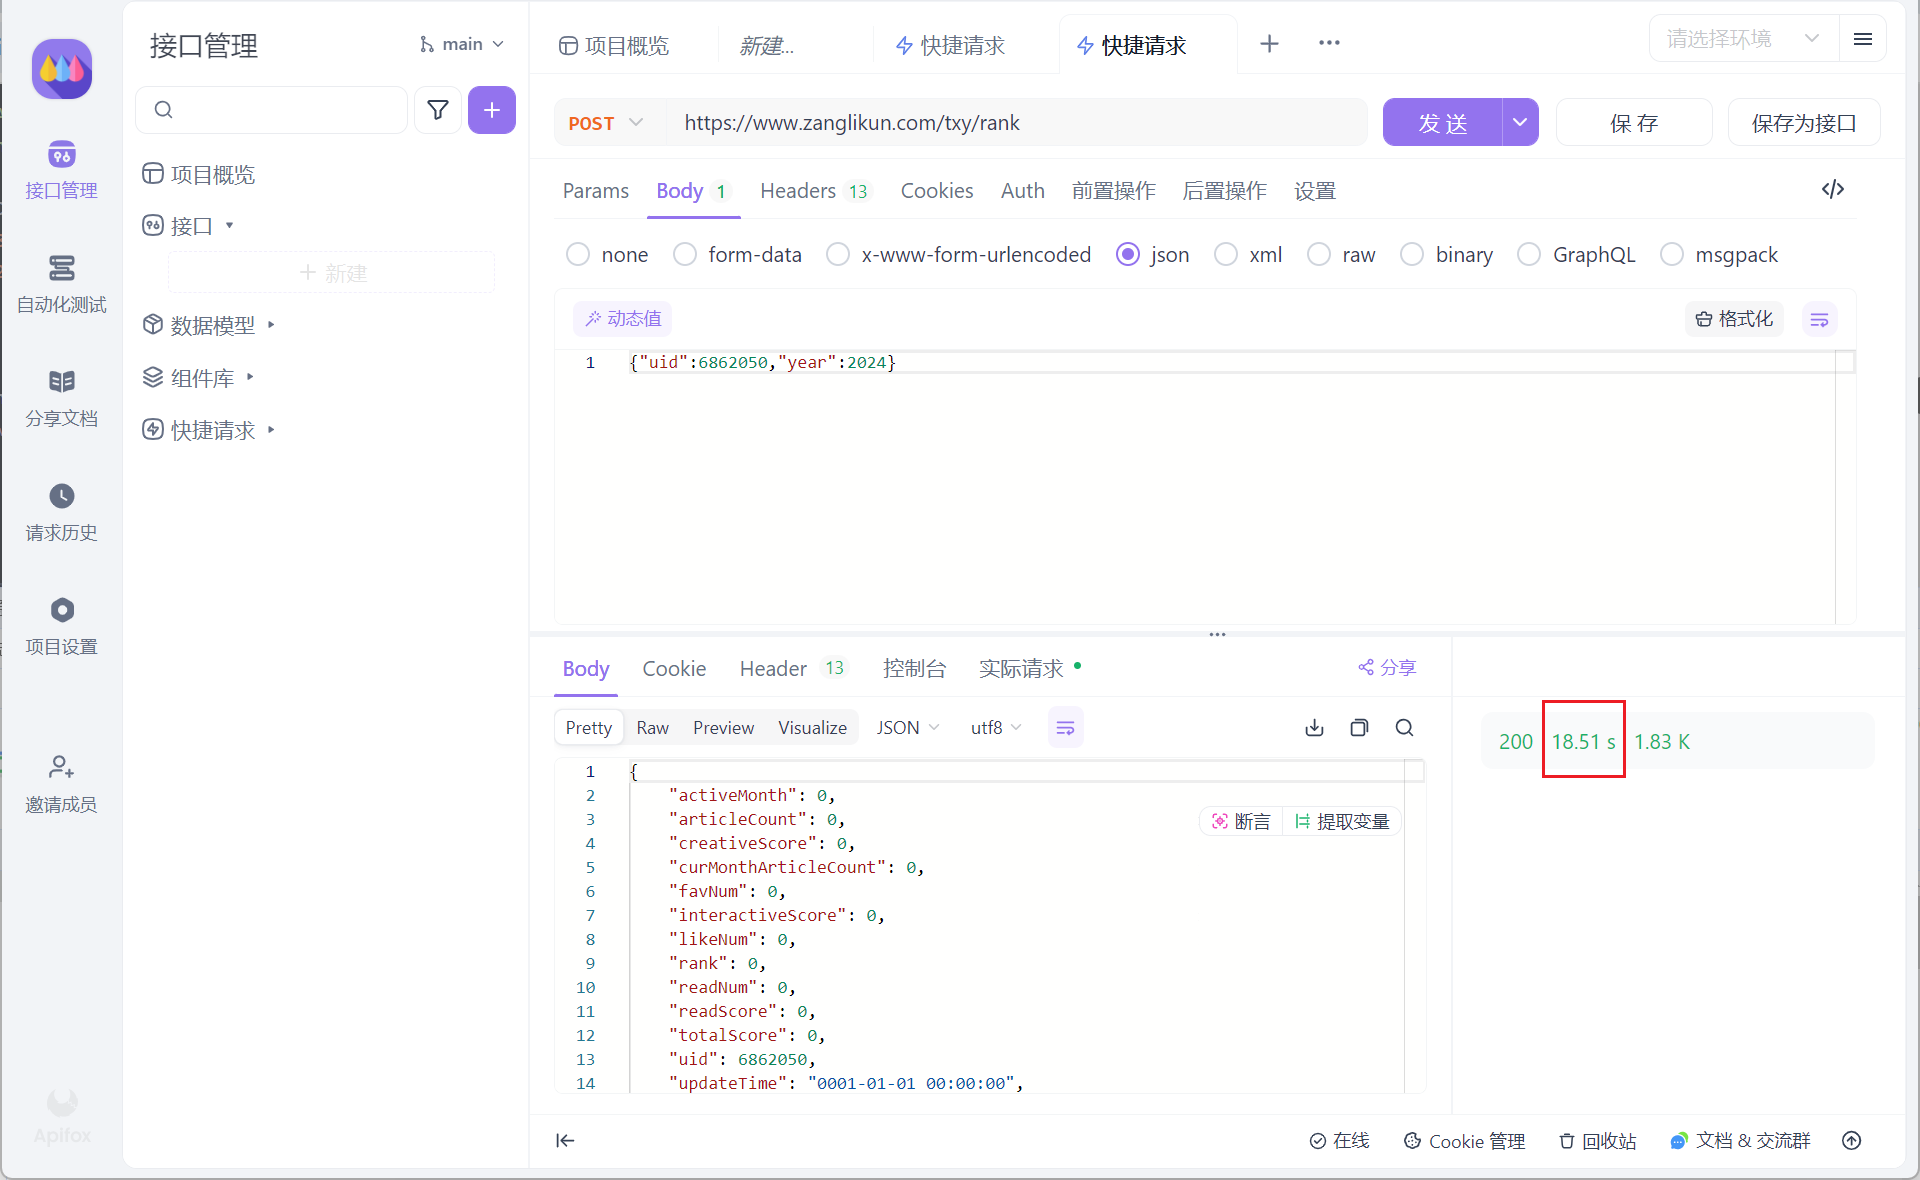
既然反向代理实现了,但是实际测试起来,功能没问题,就是接口慢。

我个人推测是腾讯云有反爬虫策略,通过NGINX反向代理后,排名速度非常慢。
但是我又想去实时刷新我的数据。我想到的解决策略是。服务器配置定时任务。定时任务去1分钟刷新一次。将请求结果保存到服务器的txt文件。然后前端页面显示的时候,去访问这个txt。就可以秒出结果了!
理论分析+实践!
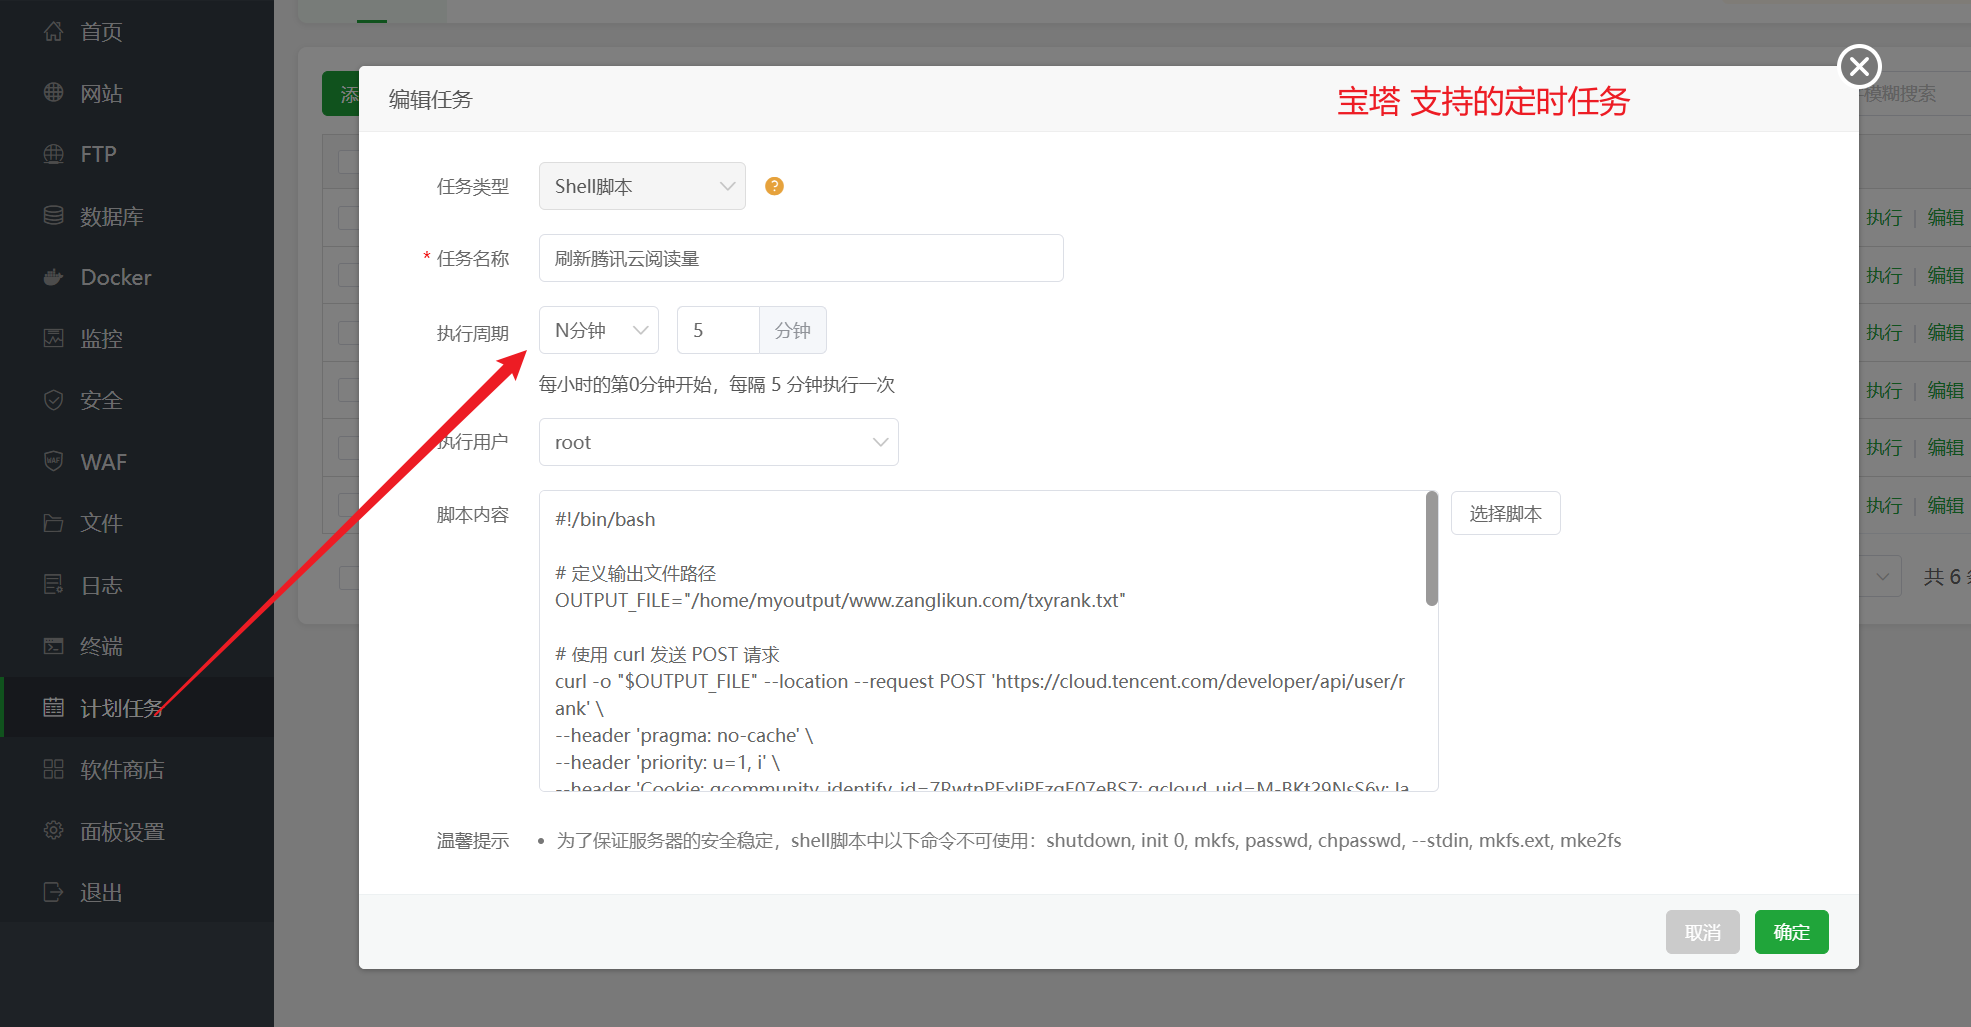
宝塔支持定时任务。

定时任务脚本如下
#!/bin/bash

# 定义输出文件路径
OUTPUT_FILE="/home/myoutput/www.zanglikun.com/txyrank.txt"

# 使用 curl 发送 POST 请求
curl -o "$OUTPUT_FILE" --location --request POST 'https://cloud.tencent.com/developer/api/user/rank' \
--header 'pragma: no-cache' \
--header 'priority: u=1, i' \
--header 'Cookie: qcommunity_identify_id=7RwtnPExliPEzqE07eBS7; qcloud_uid=M-BKt29NsS6v; language=zh; qcmainCSRFToken=qpCIFG2Zi2VD; qcloud_visitId=c880bf4e8f77ccbd868c5e1f69f30f35; qcloud_outsite_refer=https://www.zanglikun.com; sajssdk_2015_cross_new_user=1; sensorsdata2015jssdkcross=%7B%22distinct_id%22%3A%221935729864181b-0135ba781948b1-26011851-1638720-19357298642d4c%22%2C%22first_id%22%3A%22%22%2C%22props%22%3A%7B%22%24latest_traffic_source_type%22%3A%22%E5%BC%95%E8%8D%90%E6%B5%81%E9%87%8F%22%7D%2C%22identities%22%3A%22eyIkaWRlbnRpdHlfY29va2llX2lkIjoiMTkzNTcyOTg2NDE4MWItMDEzNWJhNzgxOTQ4YjEtMjYwMTE4NTEtMTYzODcyMC0xOTM1NzI5ODY0MmQ0YyJ9%22%2C%22history_login_id%22%3A%7B%22name%22%3A%22%22%2C%22value%22%3A%22%22%7D%2C%22%24device_id%22%3A%221935729864181b-0135ba781948b1-26011851-1638720-19357298642d4c%22%7D; intl=; _ga=GA1.2.1963929058.1732334160; _gat=1; qcstats_seo_keywords=%E5%93%81%E7%89%8C%E8%AF%8D-%E5%93%81%E7%89%8C%E8%AF%8D-%E8%85%BE%E8%AE%AF%E4%BA%91; _gcl_au=1.1.760994683.1732334160; qcloud_from=qcloud.outside.seo-1732334160061; trafficParams=***%24%3Btimestamp%3D1732334267072%3Bfrom_type%3Dserver%3Btrack%3D225baed5-1c2b-4203-978a-94c1f7b31b5a%3B%24***' \
--header 'content-type: application/json' \
--data '{"uid":6862050,"year":2024}'
测试请求结果:
https://www.zanglikun.com/txyrank.txt
请求没问题了,
直接调整新版HTML
<!DOCTYPE html>
<html lang="en">
<head>
    <meta charset="UTF-8">
    <meta name="viewport" content="width=device-width, initial-scale=1.0">
    <title>Fetch User Article Read Number 改进版</title>
</head>
<body>
    <h1>User Article Read Number 改进版</h1>
    <div id="articleReadNum2">数据是:Loading...</div>

    <script>
        // Function to fetch data from the API
        async function fetchUserData() {
            try {
                const response = await fetch('https://www.zanglikun.com/txyrank.txt', {
                    method: 'GET',
                    headers: {
                        'Content-Type': 'application/json'
                    }
                });

                if (!response.ok) {
                    throw new Error('Network response was not ok: ' + response.statusText);
                }

                const data = await response.json();

                // Assuming the structure of your response
                const articleReadNum = data.user ? data.user.articleReadNum : 'No data available';

                // Display the articleReadNum
                alert("本地临时Cache:"+articleReadNum); // 更正为 alert
                document.getElementById('articleReadNum2').innerText = articleReadNum;

            } catch (error) {
                console.error('There was a problem with the fetch operation:', error);
                document.getElementById('articleReadNum2').innerText = 'Error fetching data';
            }
        }

        // Call the function to fetch data when the page loads
        fetchUserData();
    </script>
</body>
</html>
最终效果展示
User Article Read Number 改进版
713989
wordpress 底部设置
<div id="articleReadNum">腾讯云当前阅读量:Loading...</div>
<script>
    // Function to fetch data from the Tencent Cloud API
    async function fetchUserData() {
        try {
            const response = await fetch('https://www.zanglikun.com/txyrank.txt', {
                method: 'GET',
                headers: {
                    'Content-Type': 'application/json'
                }
            });

            if (!response.ok) {
                throw new Error('Network response was not ok: ' + response.statusText);
            }

            const data = await response.json();
            const articleReadNum = data.user ? data.user.articleReadNum : 'No data available';

            document.getElementById('articleReadNum').innerText = '腾讯云当前阅读量:'+articleReadNum;

        } catch (error) {
            console.error('There was a problem with the fetch operation:', error);
            document.getElementById('articleReadNum').innerText = '腾讯云当前阅读量:Error fetching data';
        }
    }

    // Call the function to fetch data when the page loads
    fetchUserData();
</script>
特殊说明:
上述文章均是作者实际操作后产出。烦请各位,请勿直接盗用!转载记得标注原文链接:www.zanglikun.com
第三方平台不会及时更新本文最新内容。如果发现本文资料不全,可访问本人的Java博客搜索:标题关键字。以获取最新全部资料 ❤
上述文章均是作者实际操作后产出。烦请各位,请勿直接盗用!转载记得标注原文链接:www.zanglikun.com
第三方平台不会及时更新本文最新内容。如果发现本文资料不全,可访问本人的Java博客搜索:标题关键字。以获取最新全部资料 ❤
